복습
https://bker001.tistory.com/471
Twitch 방송 알림 장치 - 10. 새로운 디자인과 PCB, 코딩
https://bker001.tistory.com/463 Twitch 방송 알림 장치 - 9. 아프리카TV API https://bker001.tistory.com/454 이번에는 저번 글에서 작성한 것처럼 아프리카 tv api에 대해 알아보겠습니다. 일단 보기에는 "누구나 쉽게
bker001.tistory.com
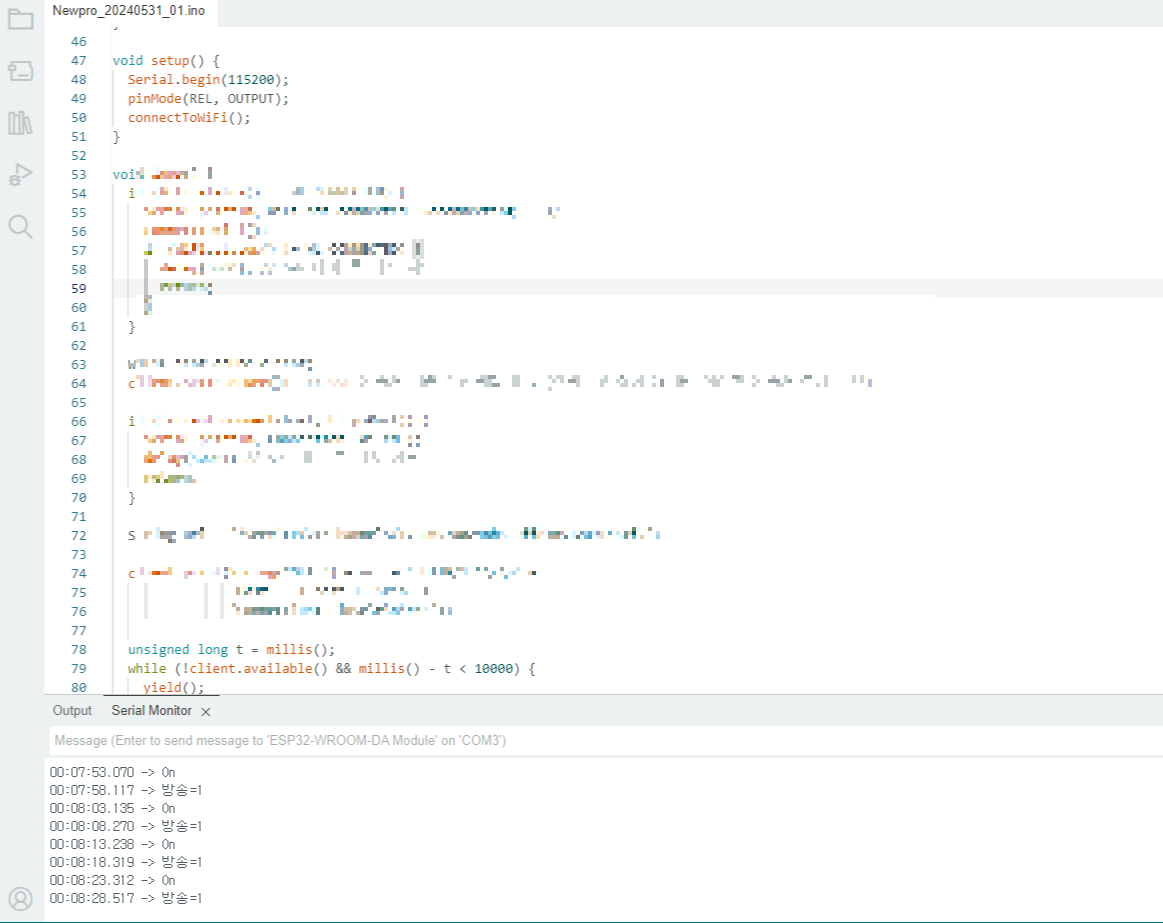

일단 치지직 방송을 감지해서 다른 출력장치와 연결은 확인했고 프로젝트가 끝난지 반년 지난 지금도 작동은 잘하네요!!!
여기서 새로운 발전 형태로 스트림 덱의 형태로 제작할까 했었는데 알아보면 알아볼수록 더 어려워지는 것들을 볼 수 있었습니다.
단순 키보드 PCB만으로도 난이도가 상당한데, 여기에 LED와 다른 기능까지 넣으라니 쉽지 않죠..
그래서 이제는 생각을 조금 많이 바꿨습니다.
새 아이디어
이런식으로 크리에이터의 얼굴을 박아놓고 흑백에서 색상이 들어오면서 방송이 켜짐을 알려주는 장치로 구상해봤습니다.
이전에 여러 방송이 켜짐을 확인하고 따로 확인이 가능한 것도 코딩을 해놨기 때문에 여기에 화면만 더하면 되는 것으로 보였습니다. 화면만!
그런데 이게 되려면 한 가지 넘어야 하는 벽이 있습니다

바로 그 화면 부품 LCD, TFT SPI 라이브러리입니다.
사실 이전에도 LCD를 많이 시도해봤는데 도저히 작동을 시키지 못해서 LCD를 켜지 못했습니다.
일단 이번 목표는 LCD에 원하는 그림 띄우기가 됩니다.
LCD 작동
LCD 작동을 위해서는
1. 어떤 LCD를 갖고 있는가
2. 그 LCD와 호환하는 라이브러리가 있는가
3. 그 라이브러리가 작동하고 업데이트가 되는 라이브러리인가
4. 작동할때 LCD의 해상도가 잘 적용되어 있는지 확인한다.
5. 이 과정에서 오류가 있다면 모두 고친다.
1. 어떤 LCD를 갖고 있는가
일단 저는 LCD로 4인치 (480x320)의 ST7796S를 구매했습니다.
(가장 후회되는 부분)
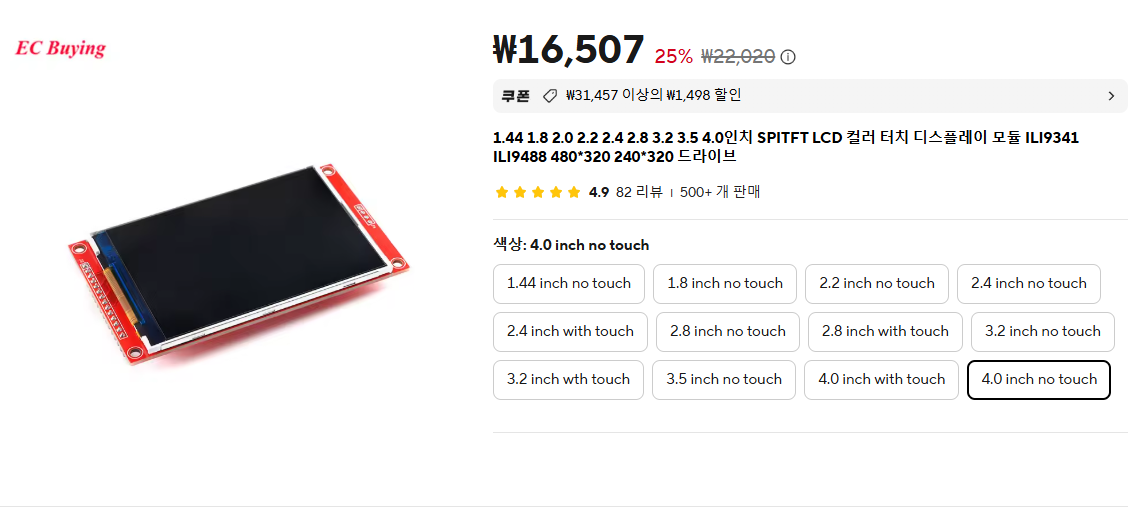

이게 가장 후회되는 부분인 이유는 이 480x320의 LCD가 흔하지 않은 터라
라이브러리를 찾는데 힘이 많이 들었고 변형도 많았기 때문입니다.
일단 LCD가 현재 480x320에 ST7796S라는 걸 알았으면 여기서부터 시작입니다.
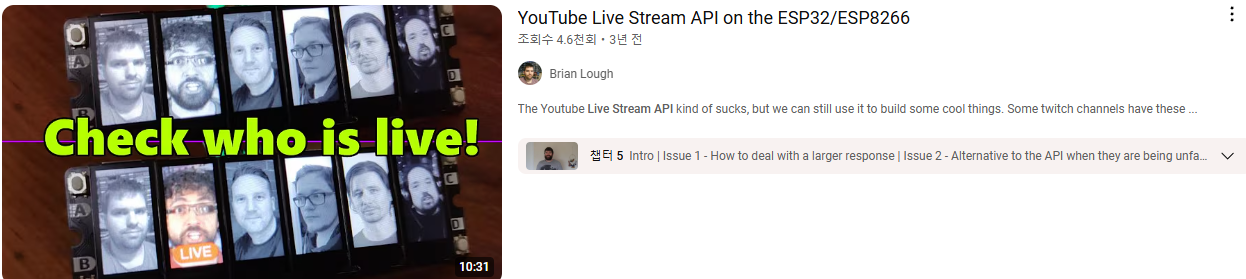
저는 기존 영상 중 아래 영상에서 기본 틀을 맨처음 시도했는데요
https://www.youtube.com/watch?v=wjQFyeVgBJg&t=262s

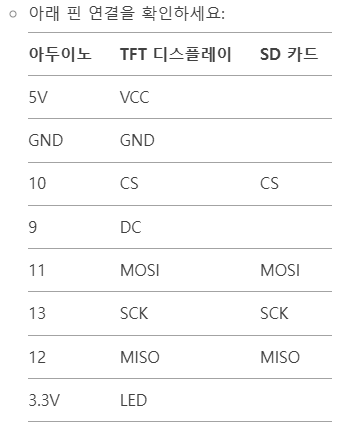
여기에서 가이드 하듯 LCD SD카드 부분에 납땜을 해주고 연결시켜줬습니다.
2. 그 LCD와 호환하는 라이브러리가 있는가

그리고 위 사진처럼 아두이노와 연결해줬는데 저는 결국 어떻게 하던 영상처럼은 불가했습니다.
일단 480x320을 아예 못받아들이는 구조라서 아래의 Adafruit_GFX는 사용이 불가했습니다.
주 오류는 아두이노가 받아들이는 LCD의 크기와 제가 인지하는 LCD의 크기가 다른 점이었습니다.
심지어 오류 중 화면이 잘려서 나오기도 하고, 이걸 해결하기 위해 외국 포럼에서는 9V 건전지를 연결해보라해서 연결해보기도 하고 그랬습니다;;


물론 ILI9341이라서 그렇다고 생각하지만, 어떻게든 Adafruit_GFX로는 결국 해결은 안되었습니다.
TFT_eSPI 라이브러리를 사용하려고 하니 아두이노의 용량이 부족해서 업로드가 안되는 현상이 발생했습니다.
때문에 이때 Esp32로 갈아탔습니다.

3. 그 라이브러리가 작동하고 업데이트가 되는 라이브러리인가
그러다 찾은게 Arduino_GFX_Library 라이브러리입니다. 2년 전이 마지막 업데이트인데 충분히 사용가능해보입니다.
https://github.com/moononournation/Arduino_GFX
GitHub - moononournation/Arduino_GFX: Arduino GFX developing for various color displays and various data bus interfaces
Arduino GFX developing for various color displays and various data bus interfaces - moononournation/Arduino_GFX
github.com
이건 친절하게도 어지간한 모든 예제들도 함께 있습니다


여기서 bmpviewer에서 따와서 코딩을 시작했는데
chatgpt의 도움을 조금 받아서 진행했습니다.
4. 작동할때 LCD의 해상도가 잘 적용되어 있는지 확인한다.
#include <Arduino_GFX_Library.h>
#include <SD.h>

#define TFT_CS 5
#define TFT_DC 2
#define TFT_RST -1
#define SD_CS 4

Arduino_ESP32SPI bus(TFT_DC, TFT_CS, SCK, MOSI, MISO);
Arduino_ST7796 display(&bus, TFT_RST, 0 /* rotation */, true /* IPS */);

void setup() {
  Serial.begin(115200);
  while(!Serial) { delay(10); } // 시리얼 연결 대기

  Serial.println("Initializing display...");
  if (!display.begin()) {
    Serial.println("Display initialization failed!");
    return;
  }
  Serial.println("Display initialized.");

  display.fillScreen(BLACK);

  Serial.print("Display size: ");
  Serial.print(display.width());
  Serial.print("x");
  Serial.println(display.height());

  Serial.println("Initializing SD card...");
  if (!SD.begin(SD_CS)) {
    Serial.println("SD card initialization failed!");
    return;
  }
  Serial.println("SD card initialized.");

  Serial.println("Drawing BMP file...");
  drawBmpFile("/image.bmp", 0, 0);
}

void loop() {
  delay(2000);
  Serial.println("Drawing purple.bmp...");
  drawBmpFile("/purple.bmp", 0, 0);
  delay(2000);
}

void drawBmpFile(const char *filename, int16_t x, int16_t y) {
  Serial.print("Opening file: ");
  Serial.println(filename);
  File bmpFile = SD.open(filename);
  if (!bmpFile) {
    Serial.println("File not found");
    return;
  }
  Serial.println("File opened successfully");

  auto gamma = [](uint8_t x) -> uint8_t {
    return (x * x * x + 128 * x * x + 128 * 128 * x) / 262144;
  };

  Serial.println("Reading BMP header...");
  if (read16(bmpFile) == 0x4D42) {
    read32(bmpFile);
    read32(bmpFile);
    uint32_t imageOffset = read32(bmpFile);
    uint32_t headerSize = read32(bmpFile);
    int32_t width = read32(bmpFile);
    int32_t height = read32(bmpFile);

    Serial.print("Image size: ");
    Serial.print(width);
    Serial.print("x");
    Serial.println(height);

    if (read16(bmpFile) == 1 && read16(bmpFile) == 24 && read32(bmpFile) == 0) {
      y += height - 1;

      bmpFile.seek(imageOffset);

      uint16_t padding = (4 - ((width * 3) & 3)) & 3;
      uint8_t lineBuffer[width * 3 + padding];

      Serial.println("Starting to read image data...");
      for (int32_t row = 0; row < height; row++) {
        bmpFile.read(lineBuffer, sizeof(lineBuffer));
        uint8_t* bptr = lineBuffer;
        for (int32_t col = 0; col < width; col++) {
        uint8_t r = *bptr++;
        uint8_t g = *bptr++;
        uint8_t b = *bptr++;
        uint16_t color = display.color565(255 - b, 255 - g, 255 - r);
        display.drawPixel(x + col, y - row, color);

          //display.drawPixel(x + col, y - row, display.color565(r, g, b));
        }
      }
      Serial.println("Finished reading image data");
      Serial.print("Loaded in ");
      Serial.print(millis());
      Serial.println(" ms");
    } else {
      Serial.println("BMP format not recognized.");
    }
  } else {
    Serial.println("Not a BMP file");
  }
  bmpFile.close();
}

uint16_t read16(File &f) {
  uint16_t result;
  ((uint8_t *)&result)[0] = f.read();
  ((uint8_t *)&result)[1] = f.read();
  return result;
}

uint32_t read32(File &f) {
  uint32_t result;
  ((uint8_t *)&result)[0] = f.read();
  ((uint8_t *)&result)[1] = f.read();
  ((uint8_t *)&result)[2] = f.read();
  ((uint8_t *)&result)[3] = f.read();
  return result;
}
5. 이 과정에서 오류가 있다면 모두 고친다.
위 코드를 정말 하루종일 잡고 있었는데요. 중간의 색상반전 코드인 부분이 없으면 사진이 아래처럼 나옵니다.
여기에, RGB 순서가 아니라, BGR 순서인점을 주의하셔서 코딩을 하셔야 합니다.


일단 이렇게 오류를 고치고 chatgpt에게 도움을 받아가며 만들 수 있었습니다.
이제 남은 건 2개를 연결하는 것이 남았네요.
다음에 이어서 진행해보겠습니다!
'메이킹 일지 (진행 중) > 인터넷 방송 알림 장치' 카테고리의 다른 글
| 인터넷 방송 알림 장치 - 12. 다중 방송 알람 구현 (0) | 2025.02.06 |
|---|---|
| 인터넷 방송 알림 장치 - 10. 새로운 디자인과 PCB, 코딩 (1) | 2024.03.01 |
| 인터넷 방송 알림 장치 - 9. 아프리카TV API (0) | 2024.02.25 |
| 인터넷 방송 알림 장치 - 8. API 코딩의 이해 / 치지직 api 성공 (1) | 2024.02.23 |
| Twitch 방송 알림 장치 - 7. 영상 제작 + 다른 방송 api 고민 (0) | 2023.12.12 |